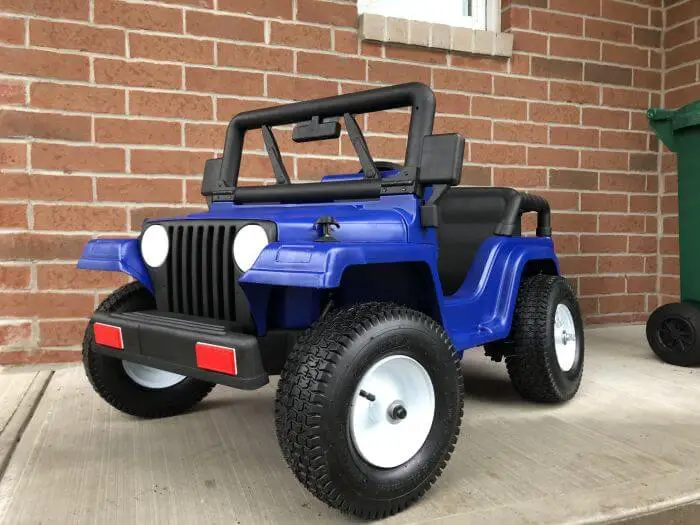
If you were anything like us growing up, the kid with the Power Wheels ride was the envy of the neighborhood! Those battery-operated jeeps were the coolest thing to roll down the sidewalk. Did they pave the way for the electric car industry? Probably!
Like all toys that play too hard, your Power Wheels car can suffer damage. The first thing to go is usually those plastic tires. This is the perfect opportunity for an upgrade. Replace the plastic wheels with rubber ones and you’re improving the durability, grip, and ride of your kid’s Power Wheels!
This is your guide on how to upgrade your plastic tires to rubber ones. Take a look at this article, gather your materials, and hit the shop!
Can You Put Rubber Tires on Your Power Wheels?
You already know the answer: Yes! And it’s a completely Backyartisan-Approved task. If you’re going to replace something, you might as well make it better. We’re talking better traction, noise reduction, improved maneuverability, and more. Basically everything your mini Formula 1 enthusiast wants in a driveway racer.
Let’s discuss a few bits of information before getting into your project.
Rubber Tires vs. Plastic Tires
Why would you want to upgrade your tires from plastic to rubber? There are plenty of reasons! Below we cover the basics of the two tire styles and the pros and cons of each.
Rubber Tires
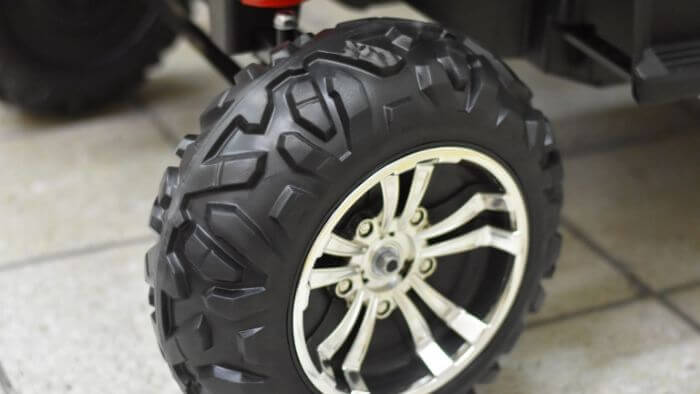
Rubber tires are made with thick and durable material. Similar to a real car’s rubber wheels, the teeny ones you can attach to your Power Wheels are strong, grippy, and can last for ages. More so, for the Speed Racers out there, you can expect better speeds, faster turns, and great traction with this upgrade. Wheelie, anyone?
PROS:
- Much better traction! Rubber is grippy, allowing for better braking and turns. You can also install traction bands as an alternative.
- Better shock absorption than plastic for curb hopping or uneven terrain.
- Much better performance in slippery conditions like snow and puddle splashing.
- Take it off-road! No need to be confined to the sidewalk.
- Tires are more stable, resulting in safer driving conditions.
- Less noise! Your neighbors will thank you.
- More stylish! If you’re going to be driving it around your cul-de-sac, it’s got to look good, after all.
CONS:
- It takes a DIY project to upgrade, but who doesn’t like working with tools outside a few hours?
- More expensive, but also comes with a much longer lifespan.
- Rubber tires will need to be pumped up, however, they sustain tire pressure for a good, long time. You can buy “never-flat” rubber tires on the market.
It may require extra effort if modifications are needed.
Plastic Tires
Your stock model Power Wheels car likely came with plastic wheels. This style has plenty of downsides that may drive your need to upgrade them! The wheels are made of a hard plastic material and are typically hollow. Susceptibility to damage, poor traction, and noisy driving are a few reasons people choose to convert their kid’s ride to rubber tires.
PROS:
- They usually come included on your Power Wheels.
- Less expensive.
- Will not need any modifications to replace.
CONS:
- The tire traction isn’t ideal.
- Lots of slipping and poor performance when in weather conditions or while braking.
- The hard plastic is very noisy on any surface, especially bumpy on gravel or sidewalk dips.
Easily damaged – cracks, dents, and dings.
Step-by-Step: How to Add Rubber Tires on a Power Wheels
Once you’re ready to upgrade to rubber tires, make sure you’re prepared! You’ll want to replace all the tires with this project. Leaving one or more tires as the old plastic versions will result in really funky driving and an off-balance car.
Know that Power Wheels parts are generally not interchangeable. If your model doesn’t have specific rubber wheels you can upgrade to, your project may take a bit more finagling and DIY skill.
Step One: Obtain Your Rubber Tires
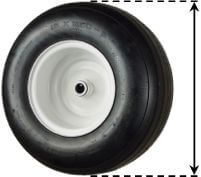
Confirm the size of wheels needed for your Power Wheels model. Double-check the size of the tires between the front and back wheels, as sometimes these are different.
First, measure the diameter of the tire – that is, the length across the tire from a 12 o’clock position to 6 o’clock.
Next, measure the bearing size. The hole that accepts the axel must be the same diameter for your wheel to roll smoothly! For most Power Wheel models, this will be 7/16”.
Ensure that the wheels you purchase will be compatible with your model of Power Wheels. Some DIYers opt for pneumatic wheels meant for a dolly or hand truck.
Keep in mind that you’ll need inner rims on your new wheels. Many replacement rubber wheels come with these already attached, but some do not. A quick search on Amazon for “power wheels rubber tires” will give you lots of options!
Another thing to pay attention to is how many tires you get with your purchase! Some sets come in pairs, while others come with four or five wheels.
Step Two: Gather Materials
- Philip’s head and flat head screwdriver or paint can lid remover
- Hammer
- Needle nose pliers
- 7/16” drive socket
Step 3: Remove the Old Plastic Tires
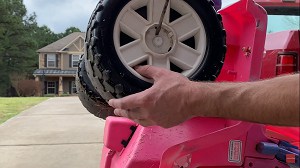
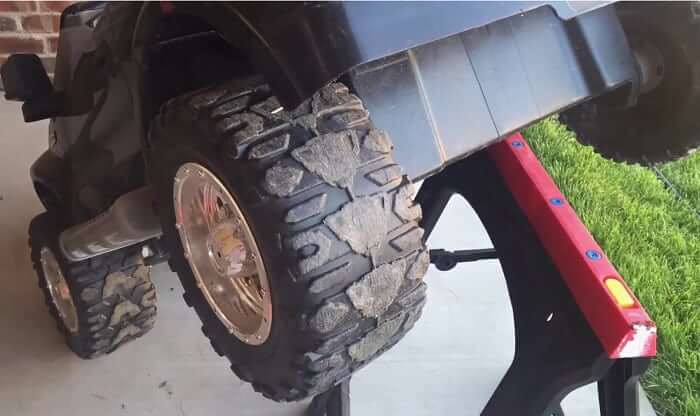
Lay your Power Wheels car on its side or lift the base onto a sturdy trunk to easily access the wheels off the ground.
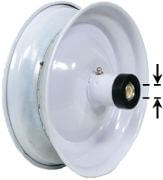
Locate the caps that secure the wheel into place (these are called the retainer caps) and remove them using a flathead screwdriver or paint can lid remover. Shimmy your way around the cap while attempting to loosen it…it can take a few attempts!
If there is a steel ring (this is called a push nut) under the cap, use a pair of needle nose pliers to rotate the ring counterclockwise and remove it. If the push nut is deformed in the process, use a hammer to gently flatten it back out for reuse.
Set the old wheels to the side.
Side note: if you don’t want to bother with the push pin, you can alternatively thread the axle rods of your Power Wheels by using a 7/16” thread die. Instead of using the push pin, you would then secure the wheel with a nut. This is a cheap, strong, and more efficient attachment method!
Step Four: Clean!
With the wheel gone, now’s your chance to clean the axel before installing your new tires. Use a rag and soapy water.
Step Five: Add New Wheels
Set one new wheel upon an empty axel. Replace the push nut on top of the axel, place a 7/16” drive socket over the ring, and gently hammer the push nut back into place. Once secure, the wheel should remain attached to the axel but be able to spin freely.
Make sure you aren’t tightening too much, or the wheels will not spin properly.
Install the retainer caps, if your new wheels include them.
Step Six: Final Checks
Give the Power Wheels car a test drive at a low speed. Make sure all the wheels are spinning evenly without wobbling. You can read the Troubleshooting section below to help work out any problems you may have.
Watch your kids closely the first few times they take their upgraded ride for a spin. Put the wheels to the test by tackling curbs, gravel, grass, and hills. Your kids will enjoy a driving course while they feel out the new tires!
Troubleshooting
I cracked the push nut when I tried to hammer it flat!
Don’t worry! You can purchase a new nut (7/16” push nut) at any local hardware store.
The wheels don’t move when the car accelerates?
You may have attached the new wheels too firmly. Double check the wheel connection to make sure they have space to move.
Ensure the tires have enough clearance on the inside border. You may need to add a spacer to the axel before attaching the wheel.
The wheels wobble when you drive?
Make sure you have attached the wheels firmly enough. Wobbling may only be apparent at higher speeds, so make sure you thoroughly test your upgrade before calling it good.
Don’t want to invest your time in entirely replacing your wheels?
You can opt for stick-on rubber sheeting or spray rubber application to reap some benefits of upgrading your wheels. This method won’t be as durable, but will certainly help some aspects of tiny-tot driving.
Some DIYers even use old bike tires, cut them to size, and glue them onto the existing Power Wheels tires for a quick tread upgrade.
The tires I got are too large for my Power Wheels.
You can complete another DIY project to add a lift to your Power Wheels car, allowing for more clearance for the larger tires.
Final Comments
You now know how to successfully upgrade your child’s Power Wheels ride from plastic wheels to rubber ones! What’s next? Might we suggest adding a seat belt?
Check out our other guide on how to make your kid’s electric car go faster for more upgrade ideas!