Whether you already own an in-ground trampoline or you’re looking to install one, there are some common issues you should know about! Understanding the setup, maintenance, and prevention that accompany a sunken trampoline can help you decide how to best solve or prevent bigger problems.
This guide will highlight a few of the most common issues you’ll encounter with an in-ground trampoline. Use this information to help you decide if you want to install this type of trampoline or how you can avoid trouble going forward!
Common Issues With Sunken Trampolines
Read on, take some notes, and tally up these common issues, how to fix them, and figure out if this project is a good fit for your yard and family!
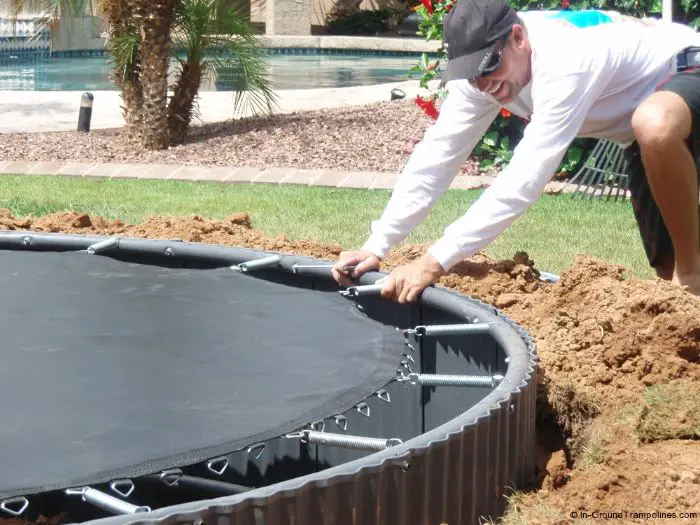
The setup and install
The number one problem you want to solve before you start digging the hole for your trampoline is to know just how big to make it. Trust us, the last thing you want to do is spend an entire day digging and setting up your trampoline just to find out the hole isn’t the correct size. Measuring is the most important step in the DIY process!
How to fix it:
Measure, measure, measure! Stick to these guidelines when preparing to dig the hole for your in-ground trampoline:
- The hole should be 1-2 feet wider than the diameter of your frame.
- The hole should be at least a few inches deep than the height of your frame and even a few more inches deeper in the center of the hole.
Hole erosion
After digging your hole, you need to ensure that the cavity walls are well structured. If you don’t, you will be dealing with hole erosion. One heavy rain or backyard birthday party, and you’re in for a mudslide! Considering how much use your in-ground trampoline is likely to have, you need some strong support under there.
How to fix it:
Build a retaining wall inside of the hole! There are several options for retaining wall material – cinder blocks, lumbar, or metal sheeting. If you purchase an in-ground model, it will come stock with a built-in retaining wall.
Drainage
You can probably imagine what happens to a hole in the ground when it rains…you don’t want to dig a pool, do you? Unless you’re in the business of breeding mosquitoes, ensuring there is proper drainage under your trampoline is a must.
A waterlogged trampoline hole also puts your foundation at risk for erosion and can lead to frame damage.
How to fix it:
Consider your soil! Do you have loose, sandy, and absorbable dirt? You may not need a drainage solution. Or do you have hard-packed clay? Closely inspect your dirt quality, especially as you dig deeper from the surface.
Some users opt to install a sump pump under their in-ground trampoline. You can also go the cheaper route and use perforated drain pipes. Of course, the option with the best guaranteed success would be to hire a professional.
Ventilation
Not only does a lack of ventilation affect the condition of the trampoline materials, but it can also alter the bounce quality!
Think back to high school physics class – solid displaces gas. So, air pushes out from under the trampoline when that jumping mat depresses down with a jump. When the mat springs back up, air rushes back in. Without proper ventilation, air cannot move effectively, and your bounce will lack some serious boing.
How to fix it:
Use ventilated spring pads. They’re easy to install and quickly solve the problem of air movement from under the trampoline.
Critter control
Something could inevitably get stuck under your sunken trampoline. Whether it be a bird, cat, or even a non-animal item like your child’s favorite doll. Getting under the trampoline can be a pain if you haven’t thought of this problem during installation.
How to fix it:
Need to get something out from under the trampoline?
- Lift the frame: Refer back to the first issue mentioned in this article. The hole you have dug for your in-ground trampoline needs to have some wiggle room at the sides – dug at least 1-2 feet wider than the diameter of your frame. This will give you some space for lifting the frame when needed.
- Remove a few springs and detach the jumping mat: instead of lifting up a heavy frame, use a spring tension tool to remove a few of the springs and open up enough space for you to get under the mat.
Need to stop things from getting under the trampoline?
- Fill the edges: you can use soft, flexible material, like pool noodles, to fill in the gap between the edge of the hole and your trampoline frame. They’re easy to remove, weatherproof, and do a dandy job at keeping critters out.
- Cover the springs: use ventilated spring pads to wall up the open springs.
Flexibility
In-ground trampolines aren’t exactly the easiest thing to move. Think of it like building a shed – you want to be certain that the spot it will take up in your yard is exactly where you want it and won’t interfere with other things.
As far as prepping a trampoline for the winter, owners of above-ground models typically disassemble and place them in the garage for storage. Expectedly, you don’t have that option with an in-ground model!
How to fix it:
Positioning: You can’t exactly fix the moveability of an in-ground trampoline. To avoid this becoming an issue before installation, take your time deciding the right location for it. Contact your city before you dig to make sure you won’t be intercepting pipes or wiring.
Storing: Utilize a trampoline cover for the winter months to protect the jumping mat from over-exposure to the elements.
Are In-Ground Trampolines Worth It?
As you can surmise, in-ground trampolines come with a decent amount of problem-solving and upkeep. They’re all the rage and popping up in backyards everywhere! They look cool, kids love them, and it’s a fun and different way to enjoy a trampoline, but are they worth it? We’ve laid out the pros and cons below.
Pros
- Safety: it is well established that in-ground trampolines are considerably safer than above-ground trampolines. There is no climbing needed, and the mat sits flush with the ground instead of 5 feet above it!
- Fun x 100: there is something about an in-ground trampoline that makes it so much more fun than an above-ground model. When parents switch their trampolines to an in-ground, they report that it gets constant use!
- Aesthetics: if your yardscape is important to you, an in-ground trampoline will be the best choice. It blends in much nicer with the landscaping you have in place or are planning.
- Durability: in-ground trampolines require a solid setup. This allows them to be much more durable than their above-ground counterparts.
- Easier to access: simply step right on and you’re ready to bounce!
- Got wind? When submerged in the earth, you won’t be faced with a flying trampoline in high wind conditions! Even in moderate wind, neighbors have found above-ground trampolines rolling through their streets.
Cons
- Overall cost: both in-ground trampolines and DIYing an above-ground model to be sunken cost money. It’s much cheaper to purchase a standard trampoline, put it together, and call it a day.
- Difficult to move: for people who like to switch things up in their yard regularly, you should know that an in-ground trampoline is quite permanent. Unless you plan on filling the old hole and digging an entirely new one. Consider this also with storing a trampoline for the winter.
- More problem solving: with an above-ground trampoline, you don’t have to worry about ventilation, drainage, hole dimensions, landscaping, or rescuing animals from underneath it.
So, is an in-ground trampoline really better than an above-ground trampoline?
The answer to this question may change depending on the person. Yet, if safety is your main concern, then yes, an in-ground trampoline is a better option than an above-ground trampoline. But, if you cannot afford to sink a trampoline or can’t keep up with avoiding the issues that come along with it, it probably isn’t the best setup for you.
To help you in this decision, weigh the above pros and cons, read about what it takes to install a trampoline in the ground, and understand the issues accompanying it. You’ve got all the information right here in this article!