Trampolines – every kid’s backyard dream! Parents, on the other hand, can go either way about it. Though we love a physically active outdoor activity for the kids, it goes without saying that when a trampoline is busted, the fun goes out the window…for everyone.
But fret not, fellow grown-ups! The Backyartisan is here to help make the process of trampoline repair a bit smoother for you. We’ve assembled this informative guide all about how to measure for replacement parts!
So, read up and get your trampoline to bounce back to get those kids back to bouncing.
Before You Begin
Don’t skip over this section! Read below to learn some important tips for keeping your trampoline in good shape, making sure your kids are using it safely, and what to do if you find something broken or damaged.
A few tips:
- Check the manufacturer of your trampoline. This can help you verify measurements and order correct replacement parts.
- Research the warranty of your trampoline. Cash in on that if it’s still active!
- Don’t wait until something breaks to fix it! Staying up to date on trampoline maintenance can help prevent dangerous breaks that can cause injury. Scroll to the bottom of this article for a few maintenance tips.
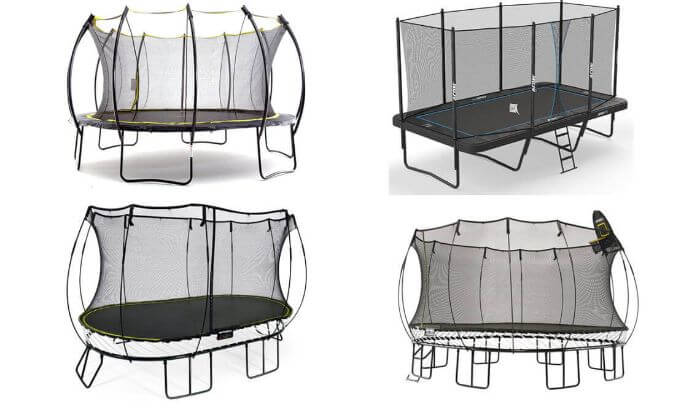
What’s in a shape?
As you may know, trampolines come in many different shapes and sizes. For this reason, measuring for correct parts is all the more important! In each measuring guide section below, you’ll see shape-specific points where applicable.
What do you need?
Gather the following items to ensure your measuring is as error-free as possible. It doesn’t take much to get the numbers down, but you still don’t want to cut any corners…even if you have a circular trampoline with no corners to cut…
Required items:
- A measuring tape that can reach fully across the longest area of your trampoline.
- Notebook and writing utensil
- A buddy to help you handle the measuring tape. Trust us on this one; it’ll be much easier to manage!
Keep in mind:
Your number one concern with any trampoline should be SAFETY. Though they serve a lot of fun, trampolines also have a high risk for injury, especially among younger kids.
Ensure kids are old enough to use a trampoline and always use adult supervision. Not only will it protect your kids, but keeping an eye on things can help prevent damage to your trampoline (is Timmy banging on the springs with a garden trowel??).
Once you’ve noticed something is broken or in need of replacement on your trampoline, do not let your children use it until it’s fully repaired! A little hole in the mat may seem harmless, but get a few kids up there going to jump-town and you may be dealing with a dangerous situation. Check out our trampoline repair guide for tips on fixing common issues.
A smart way to keep trampolines safe in your backyard is to develop a list of family rules to play by. Your kids should be old enough to understand and remember the rules to get their bounce on!
How to Measure Trampoline Mats
Mat: the large bouncing surface area of the trampoline.
First, you’ll need to find out the size of your trampoline frame. It’s recommended that you do not measure the mat itself, as this can stretch over time and with use. Instead, you will measure from the outer frame, including the springs’ length!
See below for shape-specific measuring information. Record three attempts for each measurement, then use the average of these numbers to get the most accurate measurement. You will typically arrive at a whole number (like 8 feet, 10 feet, etc.) for each measurement…if not, round up!
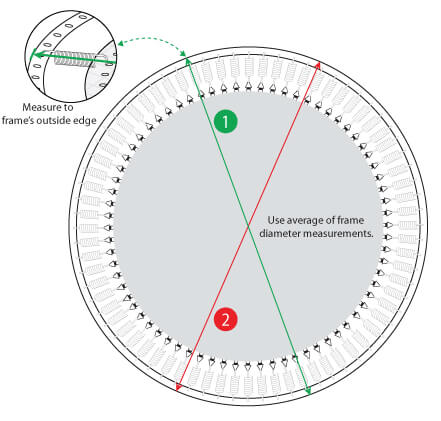
- Measure the Frame Size
- Circle: measure the diameter at a few different cross sections. You will end up with one measurement.
- Oval: measure both the width and the length, in other words, the short diameter and the long diameter. You will end up with two measurements.
- Rectangle: measure your length and width, still using the outer metal edge as your boundary. Use a few measurements from each edge to get an average for the two different sides. You will end up with two measurements.
- Square: don’t just measure one side and call it good. Get a measurement of each side and use those four numbers to obtain your average! You will end up with one measurement.
- Count the eyelets or V-rings in the mat – how many springs attach the mat to the frame?
As the old saying goes, Measure Thrice, Order Once!
How to Measure Trampoline Springs
Springs: the metal coils that attach your mat to the frame.
It’s pretty common for a spring to become bent, broken, or even go missing. Thankfully, they’re easy and quick to replace. Just make sure your kids aren’t jumping on the trampoline when you have springs removed.
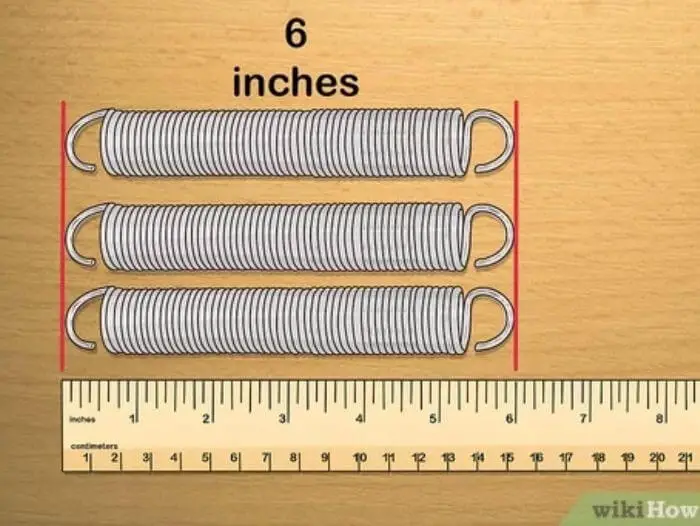
- Remove at least three springs to measure. You’ll use these three springs to obtain an average measurement.
- Measure the length of one spring, from the end of one hook to the end of the opposite hook.
- Repeat for all three springs to obtain an average number.
You’ll need to measure the springs when unstretched, so yes, they need to be removed! When measuring your springs, do not include the V-ring (the metal ring sewn into the trampoline mat).
How to Measure a Trampoline Net
Net: the safety screen supported by poles and surrounds your trampoline.
A safety net is an optional piece of equipment for your trampoline. They may or may not include a zipper or clip closure. A net can be good to have for younger children to prevent them from tumbling off the edge.
Measure for a net replacement:
- Measure the size of your frame, as described above under How to Measure Trampoline Mats.
- For non-circular trampolines, measure the entire outer border of your shape to find how long you need the net to be.
- Count the number of supportive poles – usually six or eight.
- Measure the height of the supportive poles to find how high you need your net to be.
How to Measure a Trampoline Pad
Pad: the thick padding that covers the springs and frame.
A pad is a very wise safety choice for having a trampoline in your backyard. One of the most common mishaps on a trampoline without a pad is having a child get their leg stuck between springs! It’s a very awkward and painful situation. Avoid it by keeping a protective pad over the springs!
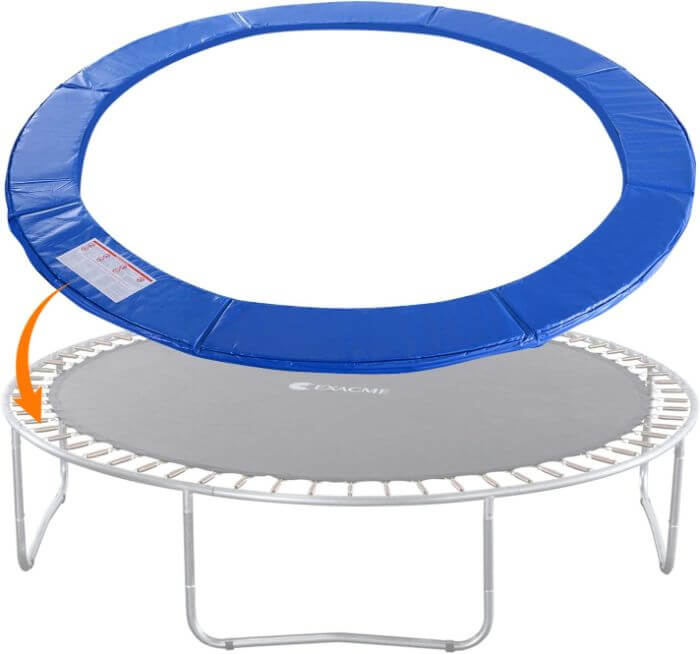
Measure for a pad replacement:
- Length: Use the frame size of your trampoline to measure for replacement pads. Remember to round up to the nearest whole number!
- Width: measure the diameter of the mat only. Subtract this measurement from your frame diameter to find how wide you need your padding.
How to Measure Trampoline Poles
Poles: the upright plastic rods that support the safety net.
There are usually only one or two lengths of poles you can choose from. A smaller diameter trampoline typically uses a shorter pole, and the larger trampolines will use longer poles.
- Simply measure end to end to verify a pole’s size. Make sure you aren’t measuring a bent pole, as that can also warp your measurement!
- If your trampoline net uses arches instead of poles, be sure to take that into account and measure the width of the arch as well.
Maintenance Tips
What’s the best way to avoid trampoline damage? Maintenance! The easiest fix to do is the fix you never have to do. Help your trampoline last longer before needing repairs, keeping it safer for you and your kids.
- During winter, or extended time without use, store your trampoline inside.
- Use an anchor kit to keep your trampoline secured to the ground and protected from harsh winds.
- If your trampoline is in regular use, replace the mat every 2 years, even if it isn’t damaged.
- Don’t exceed the recommended weight limit!
- Regularly inspect your trampoline for signs of damage like fraying, holes, or bent springs.
And just a reminder, because it’s that important: keep the kids off the trampoline any time you notice damage or faulty parts. The best way to remind kids that the trampoline is off limits is to flip it over so it’s inaccessible, remove the climbing ladder, or tape a big X across the top with easy-to-remove masking tape.
Final Comments
We hope this guide has been helpful for you in your trampoline ownership journey. Keep those jumpers in ship shape and replace damaged parts immediately! On an ever-constant quest to create a fun and interesting backyard for your kids, a well-maintained trampoline can be a great addition. If you need a new one, head over to our trampoline buying guide too. Bounce on, Backyartisans, bounce on.