Chances are you didn’t come to this article because you love Sludge Sliders or Dirt Pudding… you’re looking for fun ideas to create your own backyard mud kitchen!
Kids love dirt. Add water, and it’s even better. No matter the season, an outdoor mud kitchen is about as fun as it gets! Thankfully, they are easy to build and guaranteed to offer hours of playtime, all within the boundary of your backyard.
A mud kitchen is an outdoor play station for your child to imagine mixing, sautéing, and baking using dirt, water, and other items from your yard. It’s a free pass to get muddy and a chance for them to turn into a nature chef!
In this article, you’ll find loads of ideas on how to create a mud kitchen in your own backyard. Get inspired, get creative, and mostly, be okay with getting a little muddy too. With the ideas in this guide, you’ll enjoy those Muck Cupcakes in no time!
Go Thrifting!
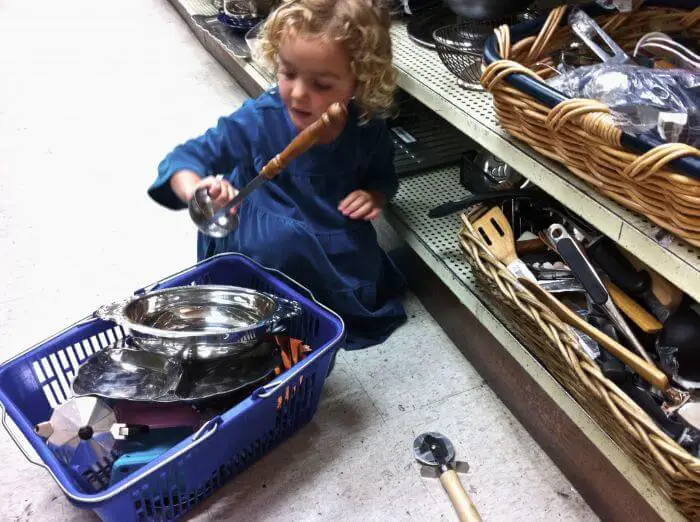
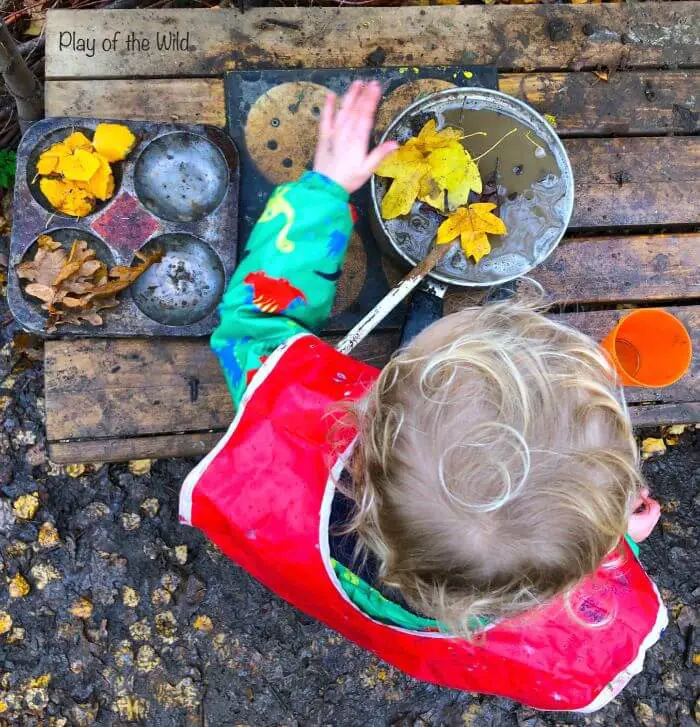
Vintage shops are goldmines when it comes to assembling your backyard mud kitchen. You can find all sorts of goods, like old muffin tins, pots, and utensils (spatulas, whisks, and spoons). If you’re lucky, you might even score an abandoned sink or enamel basin to repurpose!
Use a Potting Table

It was made to get dirty, after all! A potting table is a durable choice for an outdoor mud kitchen. They usually come with shelves, a table, and even a sink to which you can hook a hose! These are an excellent option for older or taller kids, as pre-made children’s mud kitchens may be too short.
Stone Veggies
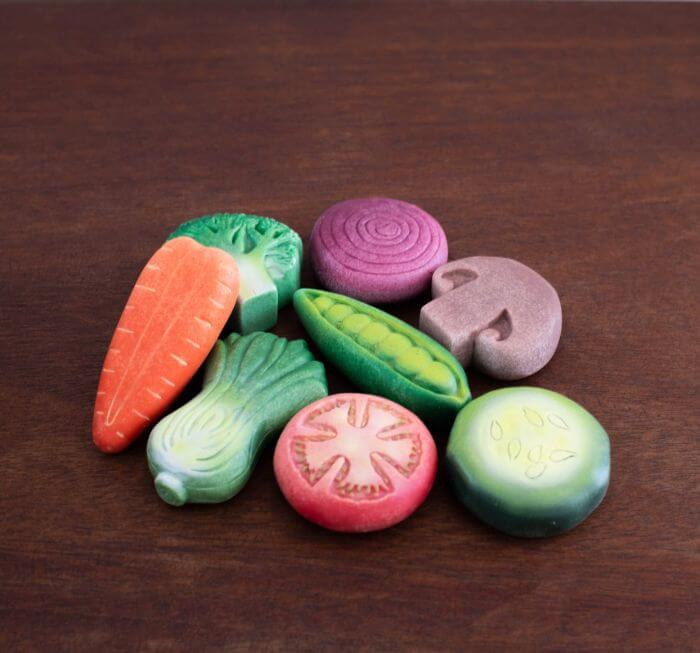
These sensory stones make for a beautiful addition to any pot of dirt soup. They are durable, gorgeous, and lovely to hold in hand. If you’re looking for a more polished mud kitchen…well, as polished as cooking with dirt can get… then these stones are for you!
Paint Your Own Ingredients
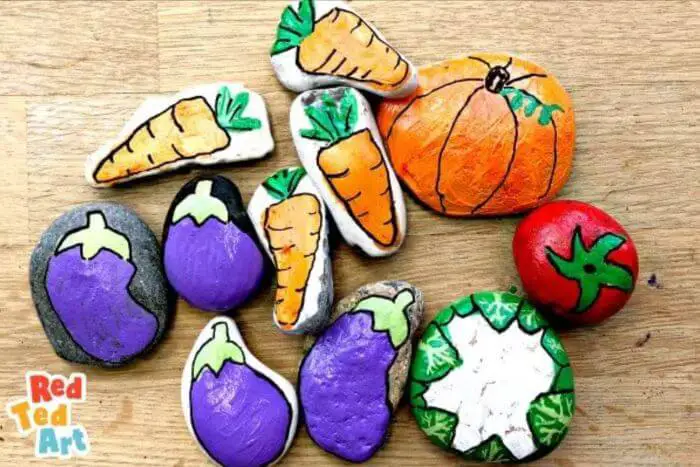
For the more crafty folks out there, you can enlist your kids to help you make your own stone ingredients! Gather a few smooth stones of varying sizes, then use eco-friendly paint to turn each stone into a veggie. You can even paint cookies, muffins, and more!
Repurpose a Garden Bed
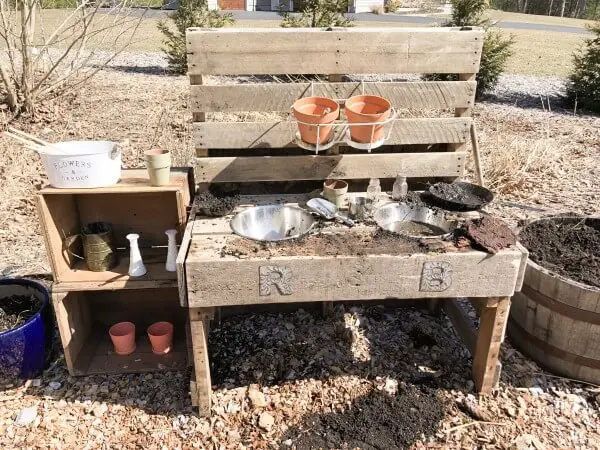
Find a raised garden bed, fill it with dirt, add a few metal bowls and shovels, and you’re done! It doesn’t get much easier than that. Your child can even dedicate a corner of dirt to planting seeds for a chef’s garden.
It’s All In The Details
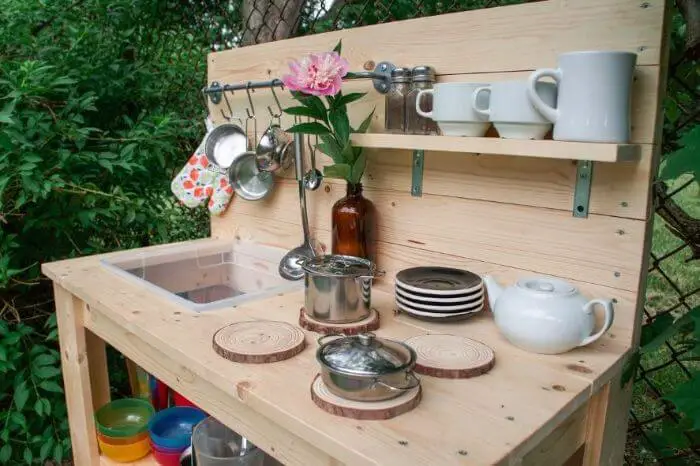
You can make your mud kitchen feel cozy by paying attention to the small details. Add a little towel bar on the side, a cute potted plant on a shelf, or a little kitchen rug. How about an old kitchen timer? You don’t want that Slime Loaf to over-bake, do you?
Use Hanging Buckets
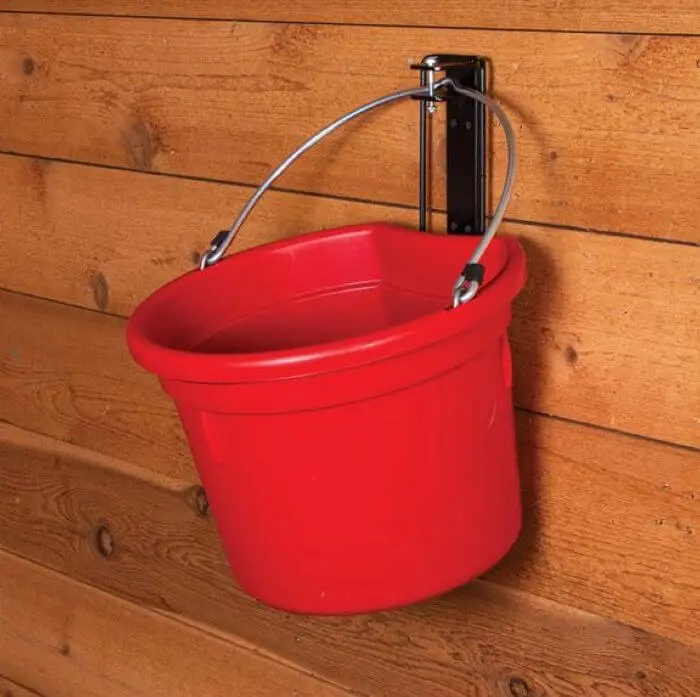
You can utilize hanging feed buckets if you’re working with a small space or want to make a minimal kitchen. Attach buckets directly to a wooden fence, or use a towel bar to hang buckets with hooks. Add a few hanging utensils to turn it into a full kitchen station.
Reuse Spice Jars

Don’t throw those empty spice jars out! Add them to your mud kitchen for kids to use for pretend play. You can relabel them with nature ingredients for extra fun, like “Tree Bark Powder” or “Five Pebble Spice.”
Make “Recipe” Cards
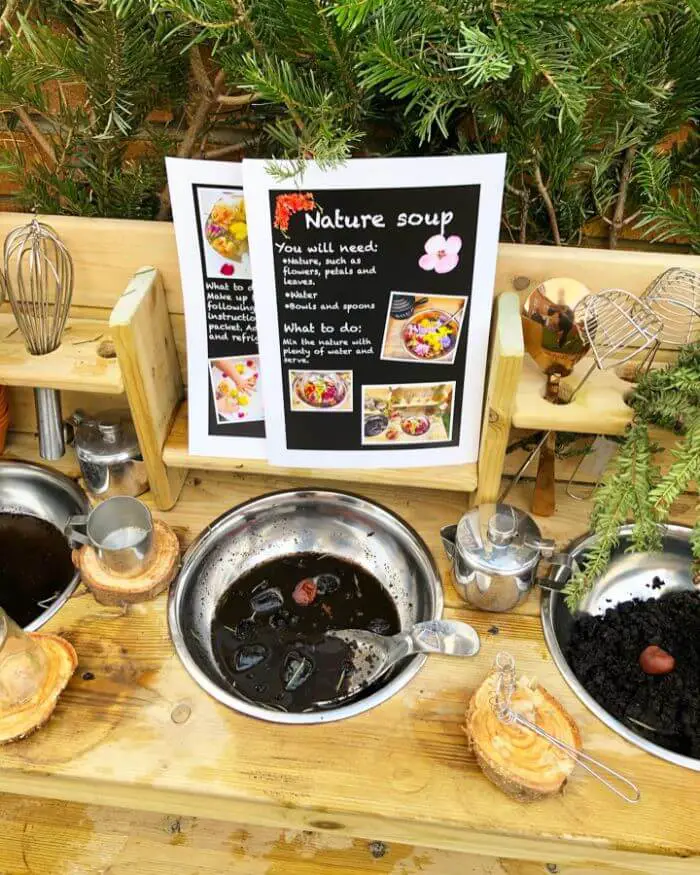
Write or draw out a “recipe” in mud ingredients on a half sheet of paper. Something like “Mud Pancakes…1 cup of mud, 2 pine cones, and a sprinkle of sand.” This is great fun for the detail-oriented kid and helps practice following directions. By the way, you might want to laminate those cards…
Tree Stumps
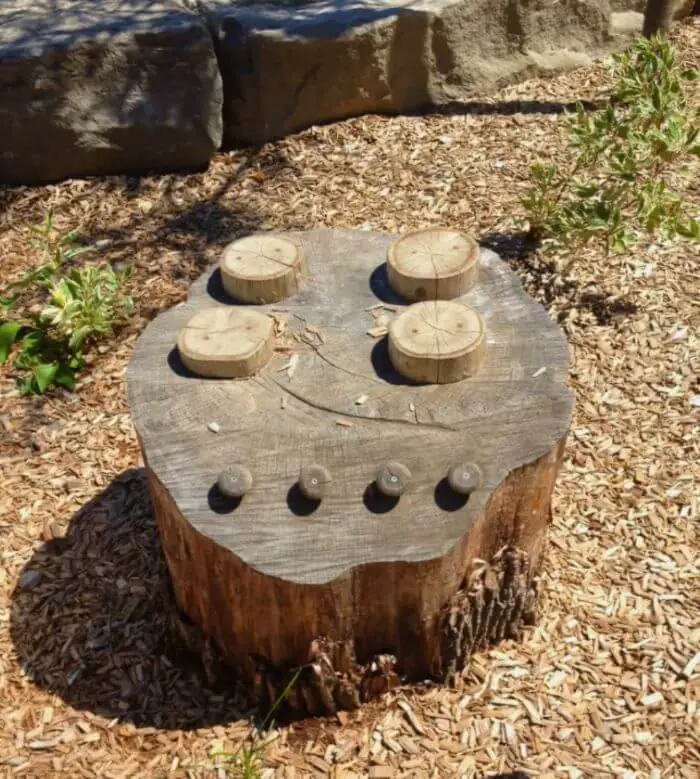
You can do a lot with a few tree stumps. Not only can it serve as your main mud kitchen, but you can also use extra stumps as dining tables and open up a whole mud restaurant! Find free stumps on places like Facebook Marketplace, Nextdoor, or just by driving around your neighborhood and noticing when someone has a tree cut down.
Minimize the Water with a Drink Dispenser
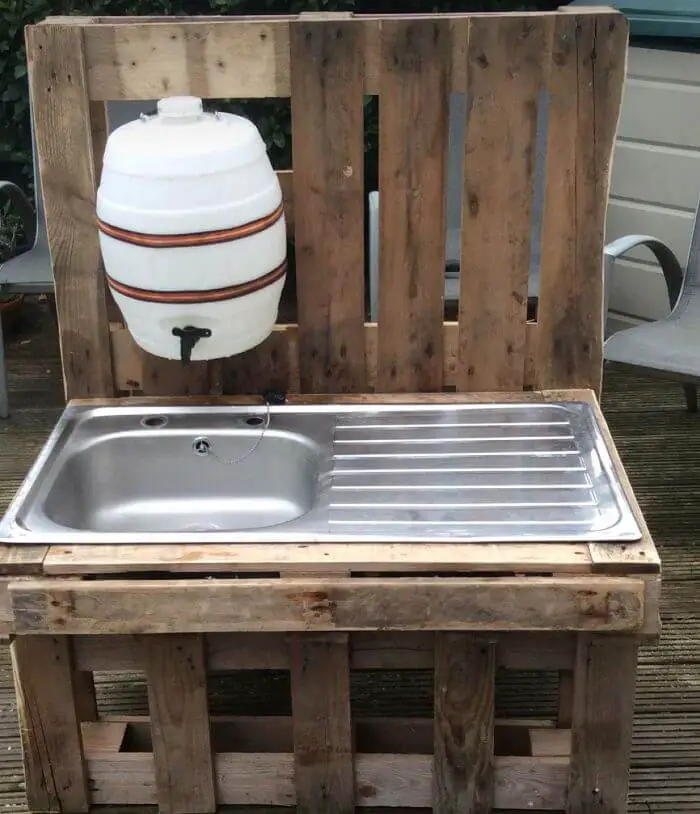
Using an old drink dispenser can be a great way to make sure too much water doesn’t go to waste. Fill up the dispenser and let your child know the amount of water they have to play with for this session.
Collect Rainwater for Play!
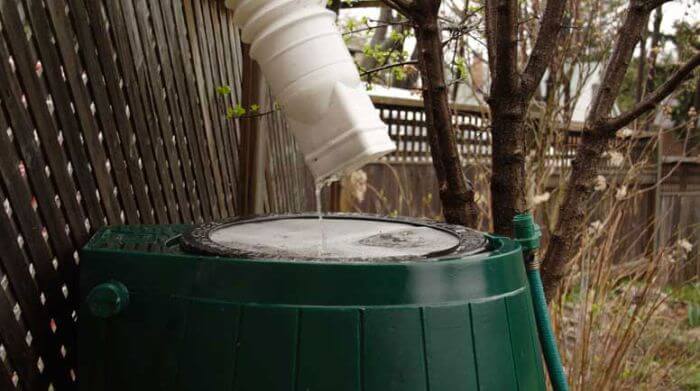
If you live in a wetter climate, a rainwater collection basin can help collect plenty of water for playtime without ever having to turn on a spigot! Better for the environment and your water bill.
Add Some Cool Tools
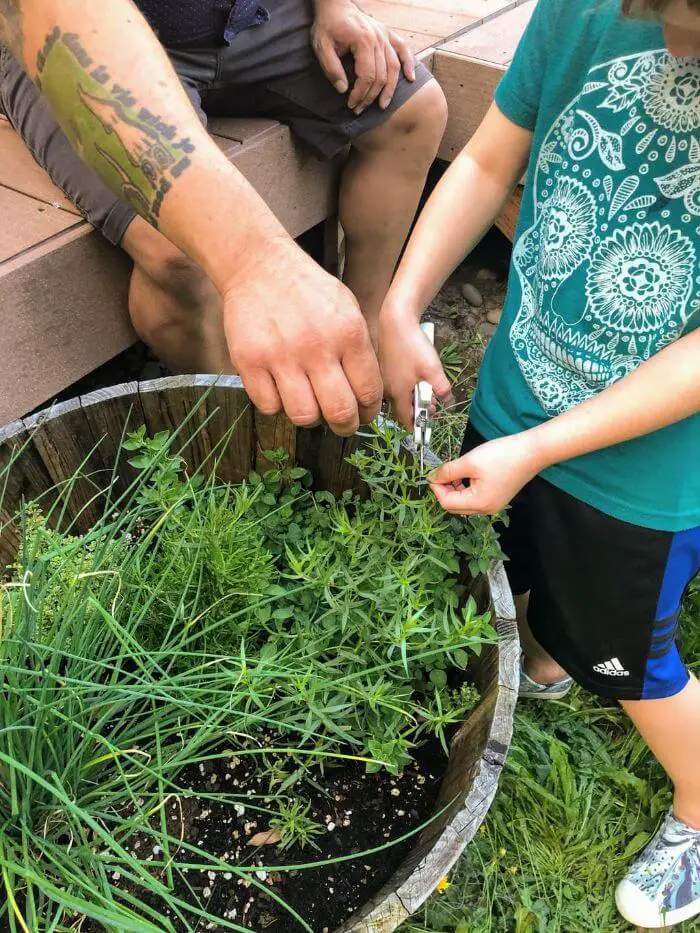
For older kids, a pair of herb snippers can be a fun way to gather specific “ingredients” for their play. They’ll feel like a real chef! But, maybe direct them towards the weeds and away from the dahlias. Always be sure to supervise when children are using tools that may be sharp.
If It’s In Your Kitchen, Add It To Theirs!
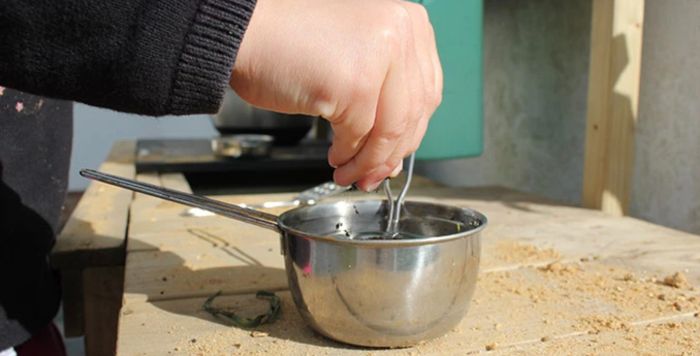
Thinking of the ‘real’ details can help kids get into their imaginary kitchen play. Consider including the things you regularly use for cooking, like an apron, measuring cups, and a rolling pin – it’s what kids love to play with when they pretend!
Clean Up Is Part of the Fun
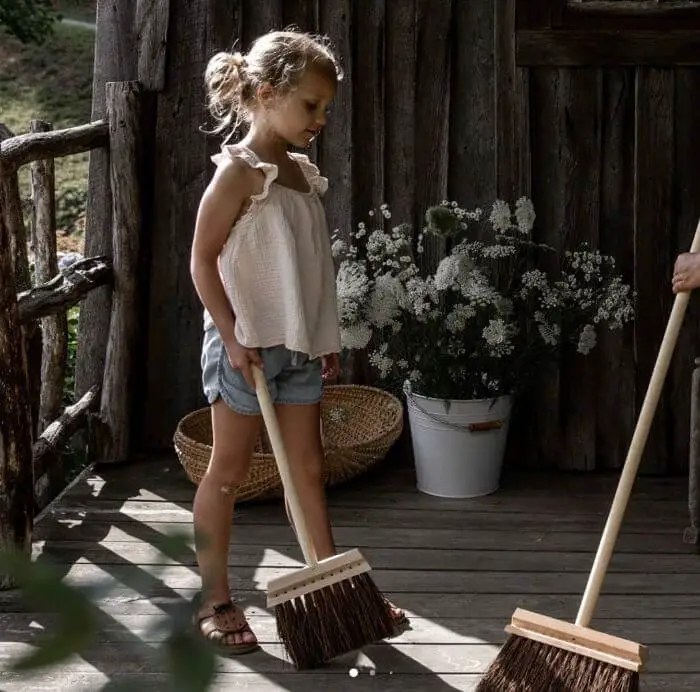
Mud kitchens are meant to get…muddy. But that doesn’t mean you can’t clean them up! Have your child help you spray down the mess and think about including some cloths or a small broom for them to use on their own.
Organize, Organize, Organize!
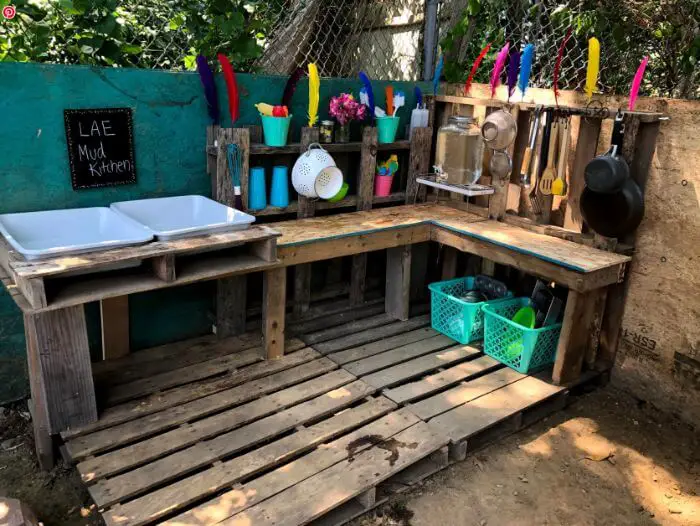
Mud kitchens will be dirty, but if everything has a proper place, it won’t ever look MESSY. Use wire baskets, hooks, shelves, or towel bars to give everything a spot to live and keep things tidy.
Use an Old Cabinet
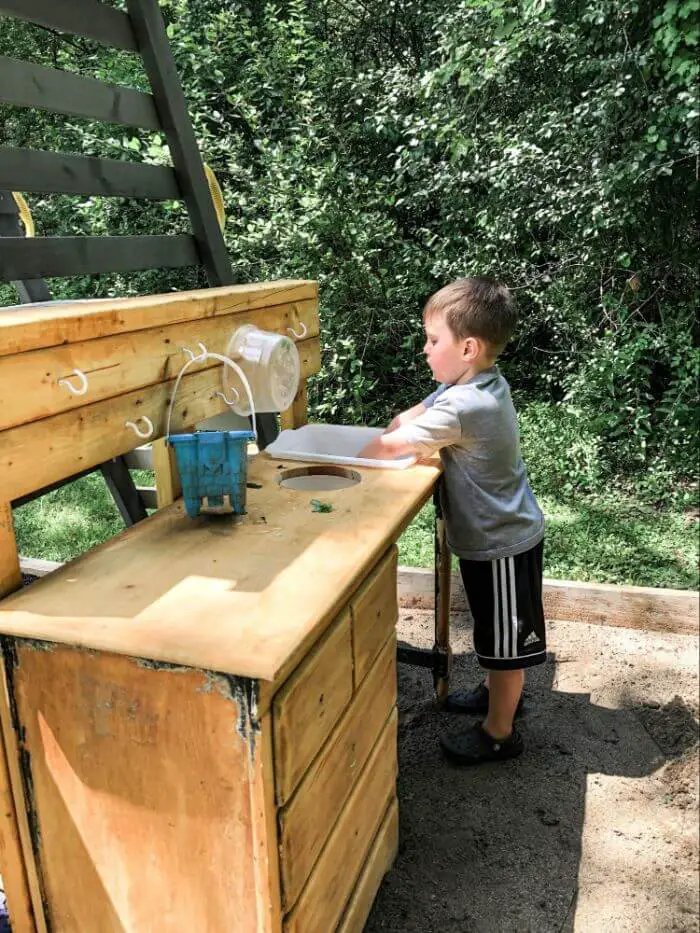
A fast way to get a mud kitchen up and running in your backyard is to find an old cabinet to transform. Add a fresh coat of paint, a spot for a sink, and some hooks for utensils, and you’re golden!
Don’t Forget the Fridge!
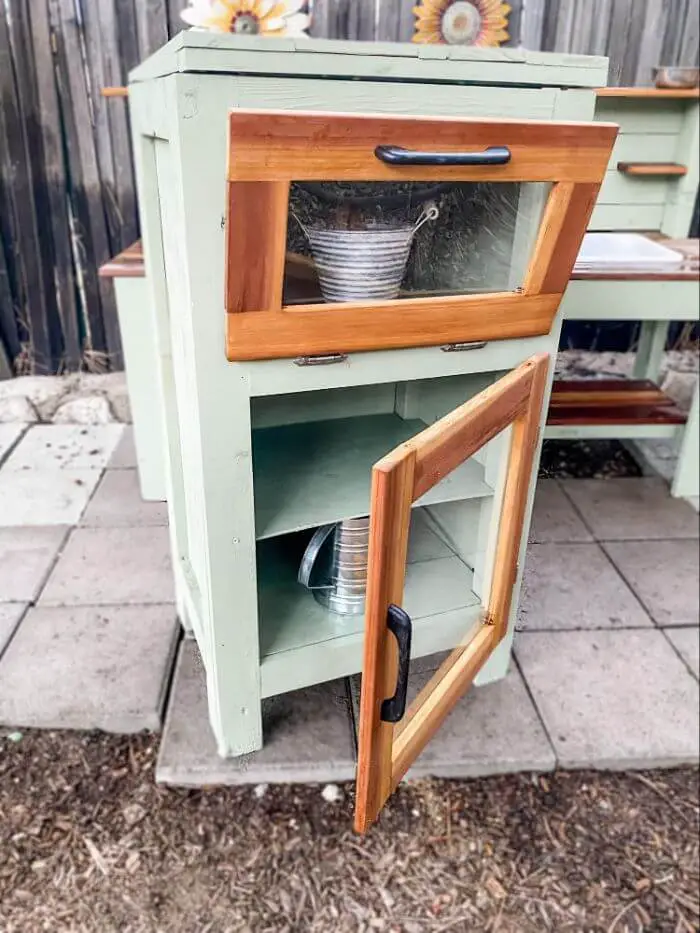
If you’ve got the space, add a fridge or pantry! Kids will love stashing their leftovers to keep for the next day in the refrigerator. You can’t let any of that Worm Pie go to waste.
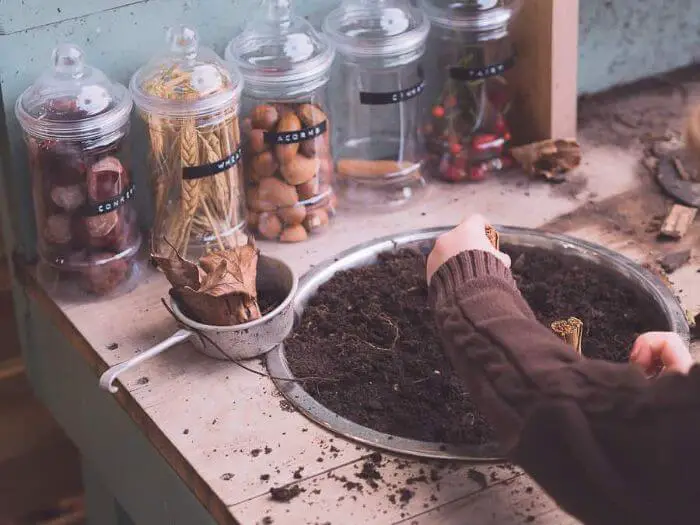
Forage for Ingredients
Hit the trails to collect pieces of nature to fill your mud kitchen shelves! Look for little pebbles, pine cones, acorns, flowers, leaves, and grasses. Stray away from perishable or potentially hazardous items like mushrooms, berries, and anything alive!
Add a Chalkboard
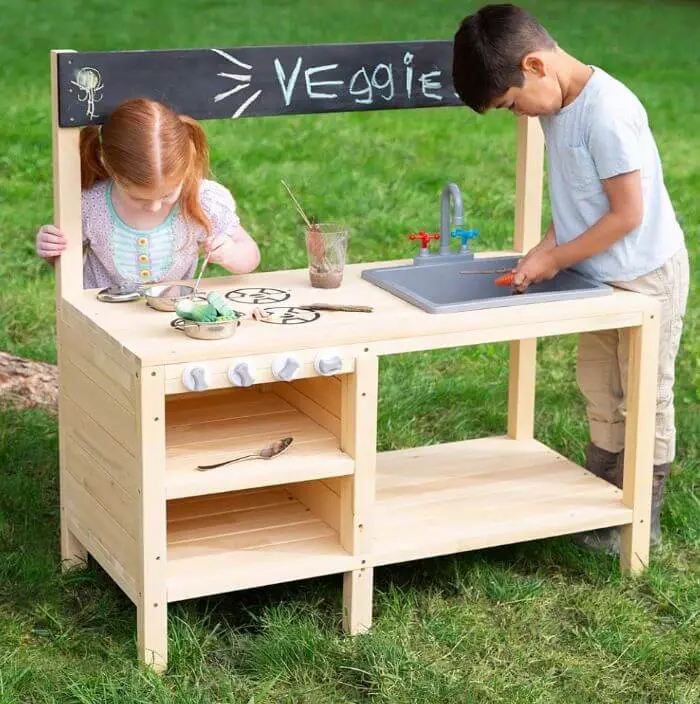
It’s a mud-bistro! Your little chef can have a spot to write the special for the day. Keep a little bucket of chalk next to your board, so your child can cross off that menu item when it goes out of stock! Soil Macarons are a trendy dessert.
Use Fun Ingredients
Add some beauty to those mud dishes with earth-friendly and long-lasting ingredients like dried roses, lavender, chamomile, or even wildflower seeds. It might be nice to see some wildflowers pop up under the mud kitchen next spring. They’ll undoubtedly get plenty of water!
Make Your Own Compostable Sprinkles
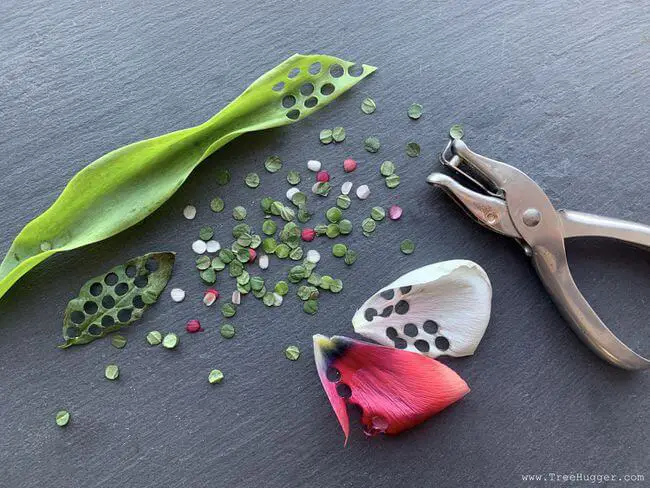
Gather some fallen leaves and petals. Use a hole puncher to cut out lots of little bits and store them in a jar to be used in your child’s next dirt creation. You can find hole punches with fun shapes like stars or hearts!
Final Comments
We hope this guide has given you many fresh ideas for building your own backyard mud kitchen. From thrifted muffin tins to chalkboard menu signs, there is so much you can do and build!
And who knows, maybe the many hours your child will spend baking those Dirt Popovers will lead to a lifelong love of cooking! Hopefully, they will shift their passion from mud to edible ingredients in the future!