A trampoline in the backyard can be incredible fun: bounce contests, mid-air twists, or just a comfy spot for cloud watching. Yet, with all that fun, there is a clear top priority for parents…safety!
Adding a net is one of the easiest DIYs you can do to your trampoline to increase its safety. It will help give you some peace of mind and give your kids a safe jumping boundary. To help you through this quick project, Backyartisan has constructed a complete guide on the What, Why, and How of trampoline safety nets!
What is a Trampoline Safety Net?
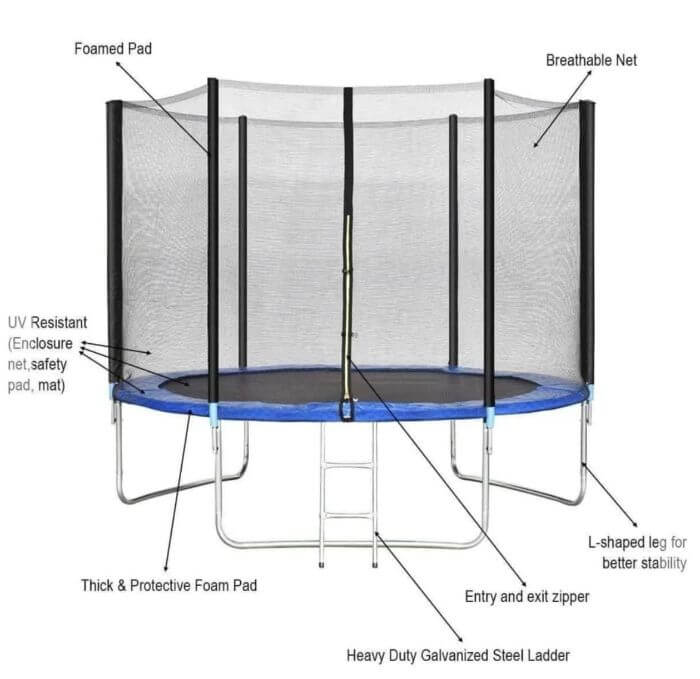
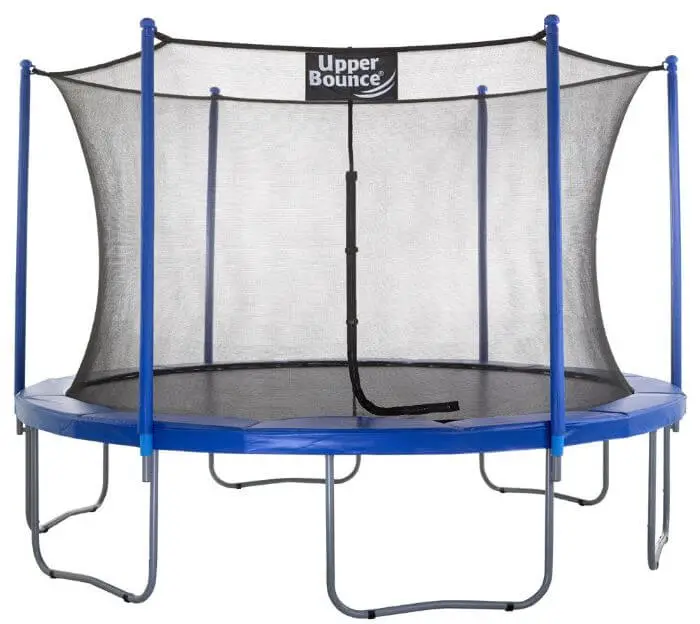
You’ve likely seen it before: the wall of netting surrounding a trampoline’s border. A safety net provides a webbing boundary that helps prevent kids from falling off the edge. It’s supported by long poles, typically wrapped in foam.
The most common method of injury from a trampoline is falling off the side! You can drastically reduce the likelihood of this happening to your child by installing a safety net. This project is a quick fix that is well worth the minimal effort it requires!
Now that you know what a safety net is…how do you add one to your trampoline? Let’s get to work!
Supplies You Need
You really won’t need much to assemble a trampoline net, aside from the materials included in the net set itself. Yet, it might be helpful to have a few tools handy just in case.
- Measuring tape – you will need this for step one.
- Philip’s head screwdriver – you may need this for attaching poles to the trampoline legs.
- Small wrench – for tightening any clamps.
- Rubber mallet – you may need this for attaching pole caps.
- A buddy – to help you manage those tall poles and tangly nets!
How to Measure your Trampoline for a Replacement Net
There are many brands of replacement nets. If the manufacturer of your trampoline does not sell a brand-specific net, you can find a generic one that will fit most trampolines. If you end up doing this, you must ensure you get the correct size by measuring your trampoline.
First, measure your trampoline’s frame size.
Your frame size is the width of your trampoline from one metal edge directly across to the other metal edge.
- If your trampoline is circular, this is the diameter.
- If your trampoline is another shape, you will want to measure the entire outside border.
Note: your frame size is not the size of the jumping mat! If you only measure across the black mat, you’ll likely end up ordering a net far too small for your trampoline. The frame size measurement will include the springs and metal frame, as well as the width of the mat.
Poles.
Before ordering a new net for your trampoline, ensure it includes poles if you do not already have them. If you have poles, you’ll need to measure those to ensure you get the right safety net.
- What type of pole does your net require? Straight, arched, curved?
- How tall are the poles?
- If your poles are connected arches, how wide are they?
- How many poles does your net require?
- Does your net have a top to it as well?
Now that you’ve measured your frame and ordered the correctly sized safety net, it’s time to put it on!
How to Assemble a Trampoline Safety Net
After you have received your trampoline safety net, you’ll want to check off a few To-Dos before you get to assembling. Did your net come with a warranty? Register it! How about an instruction manual? Some brands even include Install Videos.
Step 1: Check your supplies
Before you start, ensure your purchased net has every item included in the kit. Your net won’t be effective if you’re missing one single pole.
Inspect the materials for signs of damage before you begin. It’d be quite the headache to assemble your entire net just to find that a pole was bent in shipping or the net has a tear!
Does everything look good? On to the next step!
Step 2: Assemble the poles
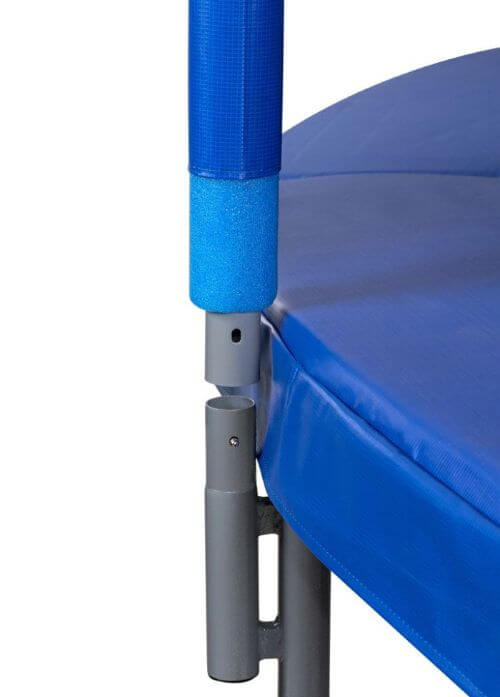
If your poles came in two pieces (like an upper pole and a lower pole), similar to a camping tent, you’d need to assemble them individually. Some poles come with rubber caps. Attach the caps before attaching the poles to the trampoline. Connect any foam padding that came with the poles as well.
Step 3: Attach the poles
You should have one pole for each leg of your trampoline frame. Some smaller trampolines use nets that only include one pole for every other leg. This makes it easy for pole placement and attaching. Poles are attached to trampoline legs via screwdriver, bolts, or clamps.
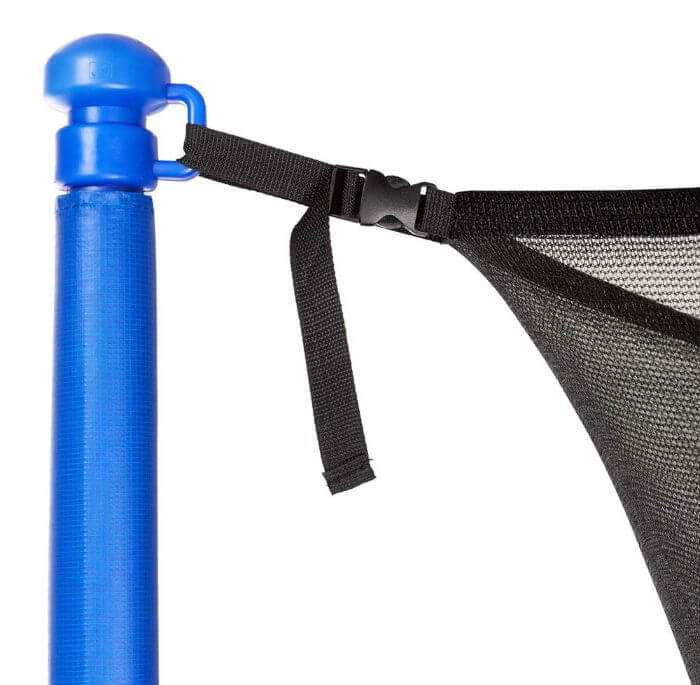
Depending on the style of your net (like if the net slides on top of the poles), you may need to attach the safety net to the poles before attaching them to the trampoline legs! See the photo below.
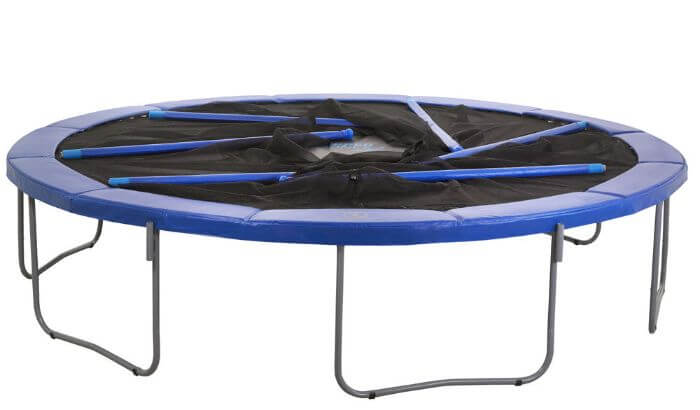
Step 4: Assemble the net
Double check the proper placement of your net according to the user manual. The doorway (a zipper, clasps, or a fabric overlap) may be located next to the warning label on the net. This warning label is likely on the bottom of the net, not the top. Meaning, that when you attach the net, you should be able to read the warning label text. If the words are upside down, your net probably is too!
Your net doorway will be placed over a U-leg of your trampoline for extra stability. Ensure your net is properly aligned and right-side up before attaching it to the poles.
Step 5: Attach the net
Top of the net:
There are a few different ways a safety net can attach to the stability poles. The net may simply sit tautly over the tops of the poles, it may attach via straps or clamps, or it could have included sleeves that slide down over the poles. Some nets include bungee loops or O-rings.
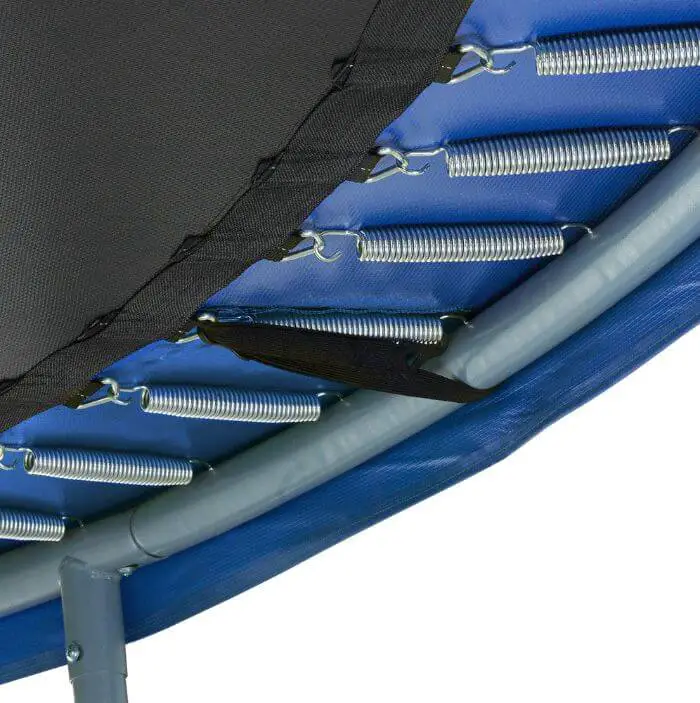
Bottom of the net:
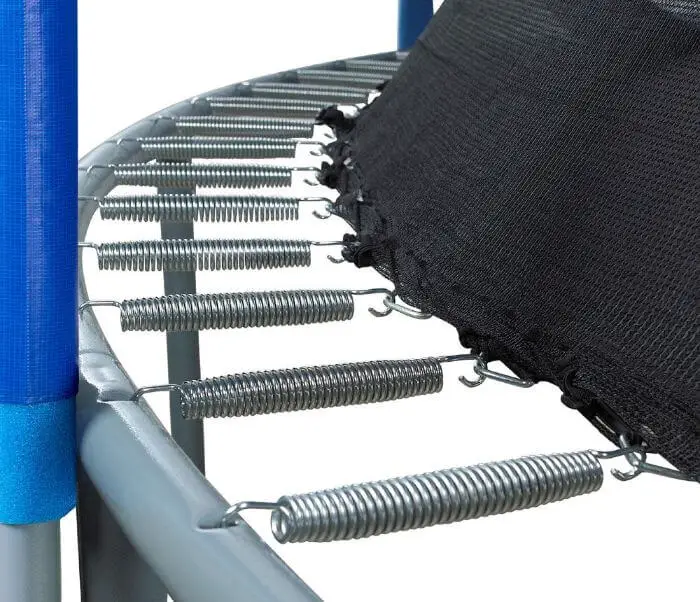
Again, there are several different methods of net attachment here. Yours may have included net clips, a length of cord, or bungees that attach to the spring V-rings. Other nets do not include a bottom closure.
Step 6: Inspect the net
Your net is installed! Time to test it out. Yes, you get to have some fun now. Jump around for a few minutes and observe the net. Does it stay in place? Is it snagging on a spring? This is your time to work out the kinks before letting the kids loose.
For the next few days after you’ve installed your net, keep an eye on it to ensure it’s been correctly set up. As is expected with trampoline maintenance, you’ll want to regularly inspect your net for signs of wear or damage.
Tips for Easy Installation
- Keep it organized!
- Identify all the pieces before you start!
- Follow the step-by-step instructions – if you skip a step, you’ll likely have to backtrack.
- Thoroughly inspect your net to ensure you’ve set it up correctly.
How to Take Apart a Trampoline Safety Net
There are a few reasons you may want to remove a trampoline safety net. Maybe you are preparing your trampoline for winter storage. Or you’re going on a summer-long vacation and want to prevent your trampoline from getting too much sun exposure while you’re away. Or lastly, you need to remove a damaged net to replace it.
How do you know it’s time to replace your safety net?
You should regularly inspect the net for signs of damage or wear. If you notice any tears or frays, it’s probably time for a replacement.
- Look at the door; whether it is the zipper, clasp, or some other mechanism, the door should always be in good working order.
- Check attachment points for fraying.
- Check buckles or bungees for cracks or breaks.
- Inspect net for tears.
- Observe poles for bending or looseness.
Take the net apart:
- Detach the net from the stability poles.
- Remove the net, and set it neatly to the side.
- Detach the stability poles from the trampoline.
- Disassemble the poles – remove any padding, caps, or clips.
- Organize small pieces into baggies. Be sure to label!
Tips for storage:
- Gather the poles together and gently roll them up into the net.
- Keep it organized by storing it in a bag or container or using Velcro straps.
- Keep the wrapped net on its own shelf to avoid any damaging snags or cuts while it’s being stored.
Final Comments
You’re committed to giving your kids a fun-filled childhood and you’re also committed to keeping them safe! Adding that net to your trampoline is a must. Keep this guide handy for when you’re ready to up the safety factor of your bounce pad or when you’re ready to fold it up into storage! If you’re looking for a new trampoline, make sure to read our guide on buying a trampoline too.